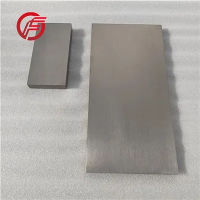

Hey there! As a moly foil supplier, I often get asked about how to weld moly foil. Today, I'm gonna share some tips and tricks on this topic. Whether you're a professional welder or a DIY enthusiast, these insights will hopefully help you achieve better results.


Understanding Moly Foil
First things first, let's talk a bit about moly foil. Molybdenum is a super useful metal known for its high melting point, excellent heat resistance, and good electrical conductivity. Our moly foil is made from high - quality molybdenum, which can be used in a variety of applications, like in semiconductors, high - temperature furnaces, and aerospace components.
Why Welding Moly Foil Is a Bit Tricky
Welding moly foil isn't as straightforward as welding some other metals. Molybdenum has a high melting point (around 2623°C or 4753°F), which means you need a high - energy welding process. Also, moly can react with oxygen at high temperatures, forming oxides that can compromise the quality of the weld.
Tools You'll Need
Before you start welding moly foil, gather the right tools. You'll need a welding machine that can provide enough energy to melt the moly. Tungsten Inert Gas (TIG) welding is a popular choice for moly foil welding because it allows for precise control of the heat input. You'll also need a welding torch, a gas supply (usually argon), and appropriate safety gear like welding gloves, a welding helmet, and safety glasses.
Pre - welding Preparation
- Clean the Foil: Make sure the moly foil is clean. Any contaminants like grease, oil, or dirt can cause problems during welding. You can clean the foil using a mild solvent and a clean cloth.
- Fit the Pieces: Align the pieces of moly foil you want to weld carefully. A good fit will make the welding process much easier. You can use clamps or fixtures to hold the pieces in place.
- Choose the Right Welding Rod: Select a molybdenum welding rod that matches the composition of the foil. This will ensure a strong and consistent weld. You can check out our Molybdenum Wire which can serve as a great welding rod option.
The Welding Process
- Set Up the Welding Machine: Set the welding machine according to the thickness of the moly foil. If the foil is thin, you'll need a lower welding current. Refer to the manufacturer's instructions for the right settings.
- Start the Weld: With the appropriate safety gear on, start the TIG welding process. Begin by striking an arc on the edge of the foil. Keep the arc short and move the torch slowly along the joint. Feed the welding rod into the weld pool as needed.
- Control the Heat: Since moly has a high melting point, you need to maintain a consistent heat input. Too much heat can cause the foil to warp or melt through, while too little heat won't create a proper weld.
- Shielding Gas: Make sure the argon gas is flowing properly. The shielding gas protects the weld from oxidation. Adjust the gas flow rate according to the welding conditions.
Post - welding Steps
- Cooling: Let the welded moly foil cool down slowly. Rapid cooling can cause internal stresses in the weld, which may lead to cracking later on.
- Inspect the Weld: Check the weld for any signs of defects like cracks, porosity, or incomplete fusion. If you find any issues, you may need to re - weld the area.
- Clean the Weld: After the inspection, clean the welded area to remove any slag or debris. You can use a wire brush or a mild abrasive.
Applications of Welded Moly Foil
Once you've successfully welded the moly foil, there are many applications you can use it for. For example, in high - temperature furnaces, welded moly foil can be used to create heat shields or electrical connections. In the aerospace industry, it can be part of components that need to withstand extreme conditions. You can also use our High temperature resistance R03600 Molybdenum Fastener in combination with the welded moly foil for various projects. And if you're into lab work, our Mo crucible can be used in conjunction with the welded parts.
Tips for Better Welding Results
- Practice on scrap pieces of moly foil before working on an actual project. This will help you get used to the welding process and the settings of your welding machine.
- Keep your workspace well - ventilated. Welding produces fumes, and proper ventilation will protect you from inhaling them.
- Check your equipment regularly. Make sure the welding torch, gas supply, and other components are in good working condition.
Conclusion
Welding moly foil can be challenging, but with the right knowledge, tools, and practice, you can do it successfully. Whether you're working on a small DIY project or a large - scale industrial application, our high - quality moly foil is here to meet your needs.
If you're interested in purchasing moly foil or have any questions about welding it, don't hesitate to reach out. We're always happy to help with your purchasing and technical needs.
References
- "Welding Metallurgy" by John C. Lippold
- "The Handbook of Materials Selection" by Michael F. Ashby